•
15-minute read
•


A broken image is a graphic file, a picture, or a photo that does not show up when the webpage is loaded. Instead of the picture, a visitor sees a broken icon.
While this is not a critical optimization issue and will not lead to serious ranking drops, broken images spoil the user experience and may prevent visitors from completing the actions they’ve come for.
This guide summarizes different reasons why images go broken – the technical issues may be more intricate than they look at first sight. Also, you will find tips and tools to help you handle broken links and pictures quickly.
If you are more of a visual learner, here is a brief video guide on identifying broken images on a website.
Broken images on a website need fixing for the following reasons:
1. Broken images hinder user experience and may result in increased bounce rates – visitors may go back to the SERP without doing what they intended.
2. Missing images may interfere with the site's crawling and indexation. If a search bot encounters a broken picture, the site’s crawl budget is getting wasted.
If there are a lot of such images, search bots may start visiting the website less frequently, and some crucial information or material may even fall out of search indices. Traffic may drop.
What's more, some types of visual content are pretty good at catching the eye – for example, high-quality infographics or striking photo reports. Therefore, finding and fixing broken images should be a priority for websites focusing on such content.
There are many reasons why such images may appear on a website, and the problem may be either on the side of the site or the visitors. In short, broken images may show up because:
Additionally, problems with your hosting provider can cause broken image issues. That's why choosing a fast and reliable hosting provider from scratch is always a must.
There are various methods to efficiently find broken images on a website. I'll begin with a straightforward manual approach and then delve into advanced techniques using tools like WebSite Auditor, Google Chrome's developer tools, and WordPress SEO plugins like AIOSEO.
If you notice a broken image on a webpage, you can discover it manually, without a special checker, by inspecting the source code.
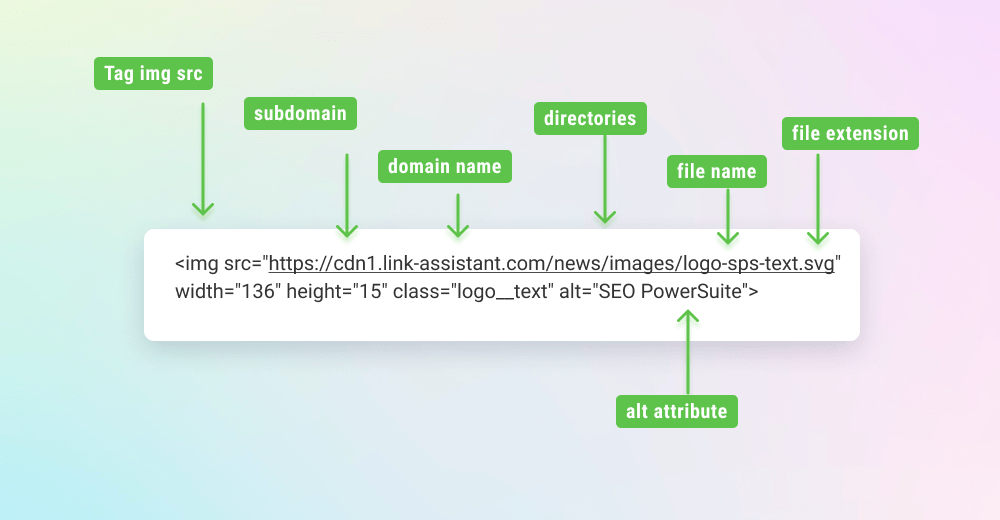
Right-click on the picture and choose to inspect the image URL. You’ve got to examine what is written in your <IMG SRC= > tag. Here’s what the piece of script looks like for an image on our website:

You can copy the image location URL to a Notepad and look for it in your document manager, comparing the actual path to the one your webpage is using.
The method above works when you see only one occurrence of a broken image. But how do you find out if there are any more missing pictures on a website? For this purpose, you can use special tools that detect broken images on a website automatically, for example, our site & link checker WebSite Auditor.
To find out if there are any broken image issues on your website, launch the WebSite Auditor checker and enter the URL of your website to create a project. Proceed with a basic setup and let the tool scan your pages. After the check-up is complete, go to Site Structure > Site Audit and see the Images > Broken images section.
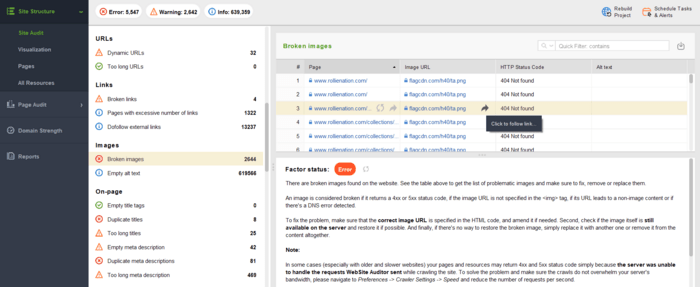

Here, the site checker will show the URL of the page where the broken resource is located and the URL of the image. Also, it shows the HTTP status code and alt text for the image, if any.
Below the list of URLs, you will see a brief explanation of the SEO factor, and how to handle it in certain cases.
If you find the image broken, alt text may give you a hint on what is depicted on this or that image. As a rule, it will be displayed next to the image icon.
Alt text enhances website accessibility for people with visual impairments, making it easier for them to understand what is depicted in the pictures via screen readers. Likewise, search engines utilize alt text for understanding what the image is about, so alt text requires optimization, too.
You can also utilize developer tools in Google Chrome to check all pics on a webpage and analyze if any of them are broken. It is handy when you need to find a broken image on only one page on the spot.
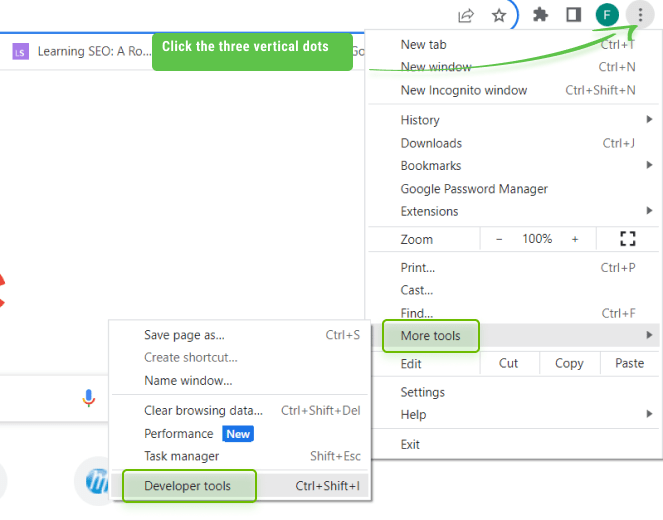
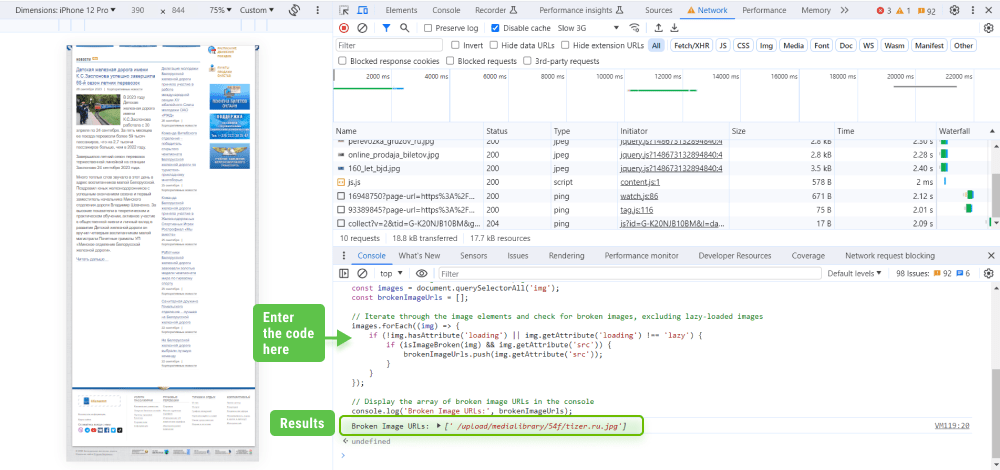
So, to find out if there are any broken image links on a webpage, go to Chrome’s More tools > Developer tools and switch to the Console tab (remember you can use F12 or Ctrl+Shift+I hotkey).
Here, copy the code below and paste it into the console window. Upon execution, the code will return the results with broken image links and all information about them.
// Function to check if an image is broken
function isImageBroken(image) {
return image.naturalWidth === 0 || image.naturalHeight === 0 || image.complete === false;
}
// Get all the image elements on the page
const images = document.querySelectorAll('img');
const brokenImageUrls = [];
// Iterate through the image elements and check for broken images, excluding lazy-loaded images
images.forEach((img) => {
if (!img.hasAttribute('loading') || img.getAttribute('loading') !== 'lazy') {
if (isImageBroken(img) && img.getAttribute('src')) {
brokenImageUrls.push(img.getAttribute('src'));
}
}
});
// Display the array of broken image URLs in the console
console.log('Broken Image URLs:', brokenImageUrls);
Here is what you get:

You can also employ another code to extract information about all images on the webpage – both broken and those that work fine. Paste the code below and scroll down to the bottom – once the browser processes all the images, it will return all information about them in the results.
// Get all the image elements on the page
const images = document.querySelectorAll('img');
const imageUrls = [];
// Iterate through the image elements and collect their source URLs
images.forEach((img) => {
if (img.src) {
imageUrls.push(img.src);
}
});
// Return the array of image URLs
imageUrls;
Finally, you can even have a small broken image / link checker of your own – just add this code to your Bookmarks in Chrome.
Open Bookmarks Manager, click the three dots in the top right corner, and select Add new bookmark.
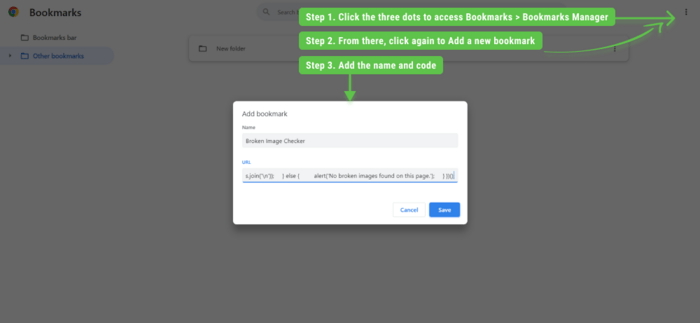

Give a meaningful name to your new bookmark, for example, Broken Image Checker, and add the piece of script.
javascript:(function() {
const images = document.querySelectorAll('img');
const brokenImageUrls = [];
function isImageBroken(image) {
return image.naturalWidth === 0 || image.naturalHeight === 0 || image.complete === false;
}
images.forEach((img) => {
if (!img.hasAttribute('loading') || img.getAttribute('loading') !== 'lazy') {
if (isImageBroken(img) && img.getAttribute('src')) {
brokenImageUrls.push(img.getAttribute('src'));
}
}
});
if (brokenImageUrls.length > 0) {
alert('Broken Image URLs:\n' + brokenImageUrls.join('\n'));
} else {
alert('No broken images found on this page.');
}
})();
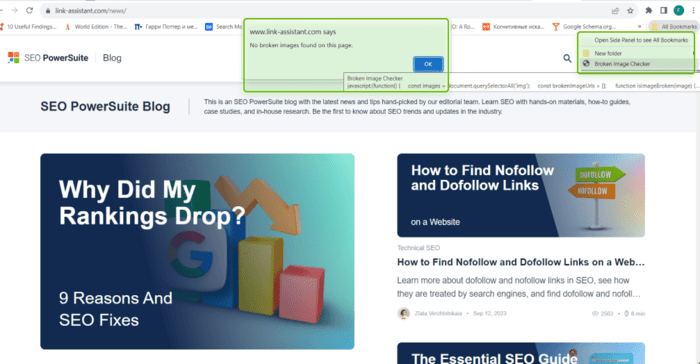
Once you visit a page that you want to analyze, select the bookmark, and it will immediately execute the code, checking if there are any broken image links on the page.

Here is a list of the best plugins that will help you detect broken images:
And of course, don’t forget that you can spot missing images during your general technical website audit you run with WebSite Auditor.
To troubleshoot broken images on a website, start by completely removing or updating the images with the correct path, file name, and type. If the error is on the client side, it's beyond your control, and users need to address it themselves.
To fix missing images on a website, address these technical issues:
Although this is a rather silly mistake, it is pretty typical, especially on large and old websites with many editors who inevitably make a mess out of all folders on the server.
All you need to do to fix the issue is to place the image in the right folder and make sure that the image path and name are relevant to the one in the URL.
The issue happens when editors mistakenly indicate their local path to the image, the way it is stored on the PC. In this case, the image directory may contain words like My Documents, Desktop, or backslashes \ instead of forward slashes /. To fix the issue, use the path to the image stored on the domain server or CDN.
Such errors may occur with re-loaded pics that get broken because of a minor typo. Pretty often, editors confuse hyphens “-” with underscores “_”. Mind that an image may go broken because of a mistake in the image extension, such as having jpg instead of jpeg, or capitalizing JPEG (or PNG instead of png) . It may come as a surprise, but the names of pages, files, or directories in URLs are case-sensitive.
If you spot any discrepancies between the rendered image and what it is supposed to be according to your CMS, rename the image or its extension and update the image source code accordingly.
Another reason for the appearance of a broken image is when a relative URL is used instead of an absolute URL. An absolute URL is a full URL that includes the domain name. A relative URL only includes the path excluding the domain name.

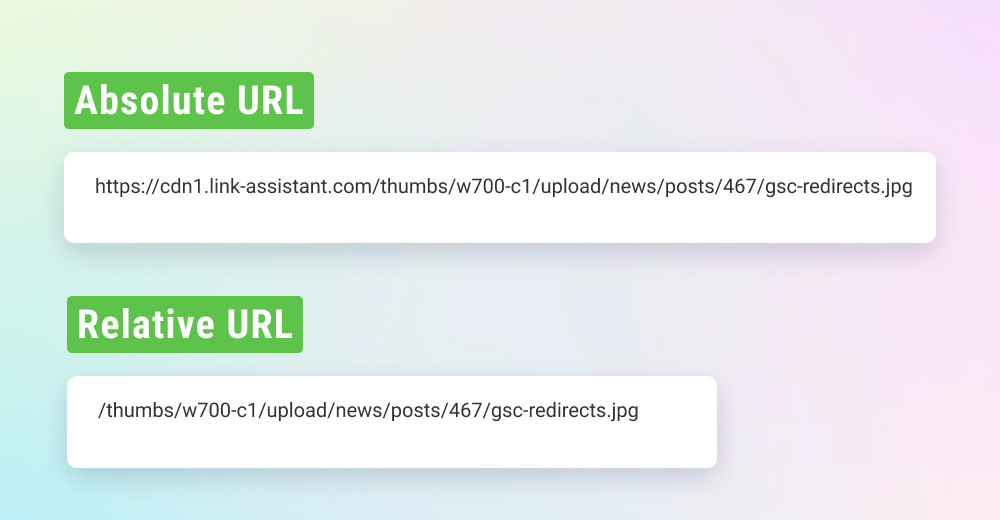
In other words, a relative URL shows where the image lies in relation to the current HTML/root domain. And if the URL gets copied and added as a link from another domain, the image link will be broken.
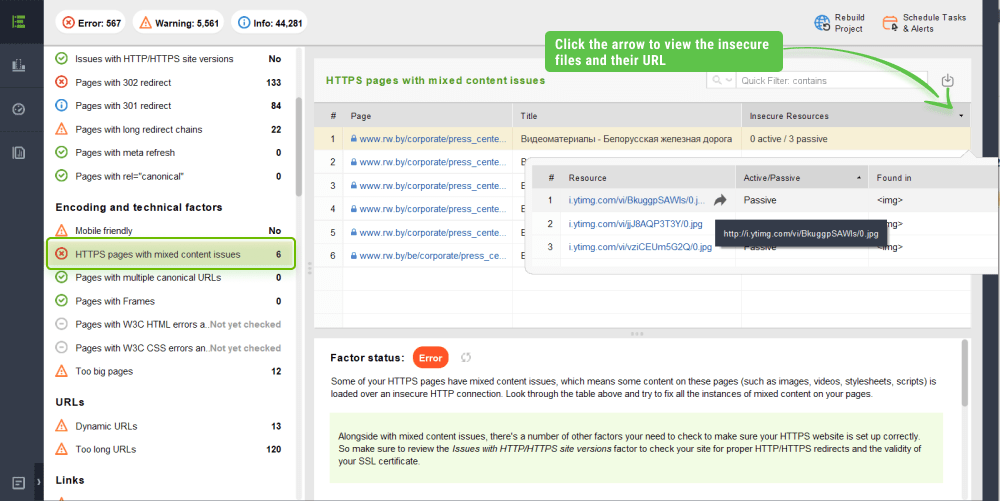
Also, speaking of image URL addresses, make sure that images are served with the right protocol: mixed content issues may occur when pics keep being served via HTTP although the whole website has migrated to HTTPS.
This will not come as a broken image issue, however, it is against best practices. You can find warnings about mixed content issues in the Site Audit > the Encoding and technical factors section of WebSite Auditor. Under Insecure Resources, click the burger menu next to each page to see the exact URLs.

Download WebSite Auditor
Hotlinking means linking to a resource hosting on somebody else’s website. In this case, the linking website does not use its own servers but steals the bandwidth of the other website it is linking to. Editors of the linked website may remove the image – in this case, the hot image link goes broken.
Hotlinking is considered a bad practice, and it is better to avoid it.
There are three types of file permissions – read, write, and execute – and the permissions can be given to document owners and groups of users. For example, you may want to allow access to certain directories and/or images on a website for only a group of users.
It is a rare case since usually file permissions are automatically set to the correct values. But accidentally, broken image errors may appear because you changed some access settings, and, next, new pictures were uploaded with restricted permissions.
This issue is not easy to troubleshoot. It may require changing the file permissions and re-uploading the image. In some cases, you can utilize a plugin to check and fix broken image links.
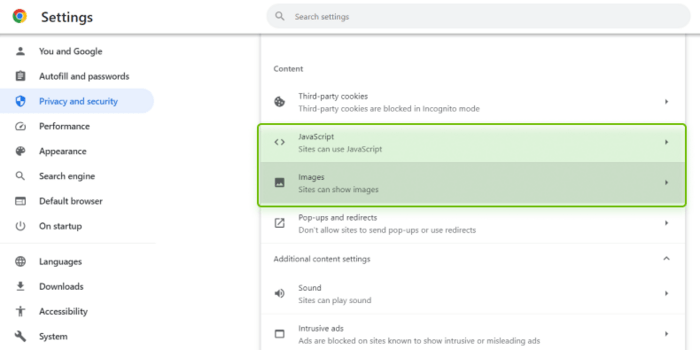
By default, browsers allow all basic functions for webpages to render a copy properly. However, if you notice a broken image on websites, recheck the settings in your browser. You can also compare how the webpage that contains images that are broken looks in different browsers.
So, here is how to fix to fix broken images if you use Chrome. In your browser settings, examine Privacy and Security > Site settings and review the Content section. Here, make sure that it shows Sites can show images and Sites can use Javascript (as some websites may employ JS for lazy-loading images to optimize page speed).

If you spot broken images on your website, don't worry. There are some things you can do to fix them. First, check if the images are in the right place. Sometimes they are not in the correct folder or have a wrong name. Also, check if someone else is using your images without permission. This can cause them to break if the other person deletes the image. Finally, make sure you have given the right permissions to access the images. Fixing these issues will make your website look better and work smoother. It will also help people find your website more easily and have a better experience using it.
Detecting such pictures is only a small part of technical search engine optimization. And if you are interested in learning more helpful stuff about it, jump to this comprehensive technical SEO guide.